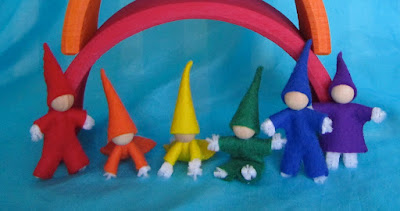
As I have promised, here is a Rainbow Elf tutorial.
What you need:
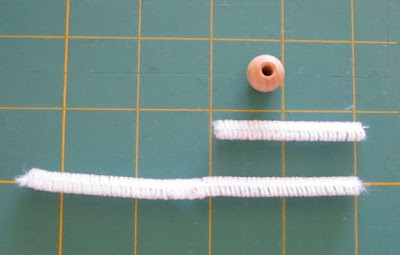
White pipe cleaner
Wooden bead 1/2" diameter
Scraps of felt
Matching thread
Needle
Scissors
Wire cutter to cut pipe cleaner
Glue (I used school glue)
Paper to make patterns
Clear tape and stapler - handy for cutting out felt
1. Cut two pieces of pipe cleaner - 2" and 4 1/2" (or, if you are using a different size bead, you can adjust lengths to look proportionate).
2. Bend the long piece in half, stick it in the bead. At this point already, Kitten grabbed it, said "doll" and was quite happy to play with it. See, kids don't need much to spark imagination! Bend the ends of a short piece about 1/4" to make hands.
3. Put arms piece in the middle of body piece against the bead and twist the body a couple of times to secure arms.
4. Now it's time to make clothes pattern. Lay your elf on a piece of paper and loosely draw around it, making a dress or an overall. You could also make separate pants, sew them to the shoulders and put a shirt over it. Be creative and make your own designs! Fold the drawing in half and cut around half of the outline, creating a symmetrical piece of clothing.
5. For a hat draw a triangle with the pictured measurements and round the bottom side.
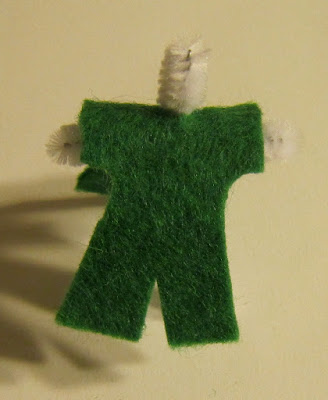
6. Cut out from felt one hat piece and a double dress/overall, laying the shoulder part of the pattern on fold of felt. Make a small hole for the neck. For a good tutorial on how to cut out felt visit Wee Folk Art blog.
7. Take the head bead off and slide the overall on the neck. Stitch the sides, sleeves and inner pants' seams using the whip stitch. Bend the ends on legs under about 1/4", trimming the pipe cleaner if needed, creating feet.
8. Stitch the straight sides of the hat using a whip stitch. Put some glue on the neck and slide the bead back on (I then took if off and slid it on the other way to reduce the amount of glue around the neck). Spread a little bit of glue on the back of the head and glue the hat in place, tilting it back. Make sure to choose the face side without imperfections.
9. And there you have it, your own personal elf, gnome, dollhouse doll or whatever else you come up with. Don't forget to share your results with me, I would love to see your creations!


How sweet! I know 4 little granddaughters that will love playing with these and one who is 13 that will love to help make them...thank you for sharing!
ReplyDeletetoo frikkin cute! and a great idea. . thanks so much for the tute
ReplyDeleteI love it! And such a detailed (idiot proof) tutorial - just what I need. Have bookmarked it, and will hopefully get a chance to try it our really soon!
ReplyDeleteThis is a fun and creative project idea.
ReplyDelete