
Monday, March 28, 2011
On a break
Friday, March 25, 2011
{this moment}
{this moment :: inspired by soule mama}
A Friday ritual. A single photo - no words - capturing a moment from the week. A simple, special, extraordinary moment. A moment I want to pause, savor and remember.
Thursday, March 24, 2011
Banana Nut Bread

Ingredients:
1/4 cup softened butter
1 cup sugar
1 egg
2 large overripe bananas
1.5 cups flour
1.5 tsp baking powder
1/4 cup buttermilk (I use dry buttermilk powder with water)
1/3 cup chopped nuts (I use walnuts)
Preheat oven to 325F. Beat together butter and sugar, add an egg and mashed bananas.


Wednesday, March 23, 2011
Rainbow Angels Mobile

Tuesday, March 22, 2011
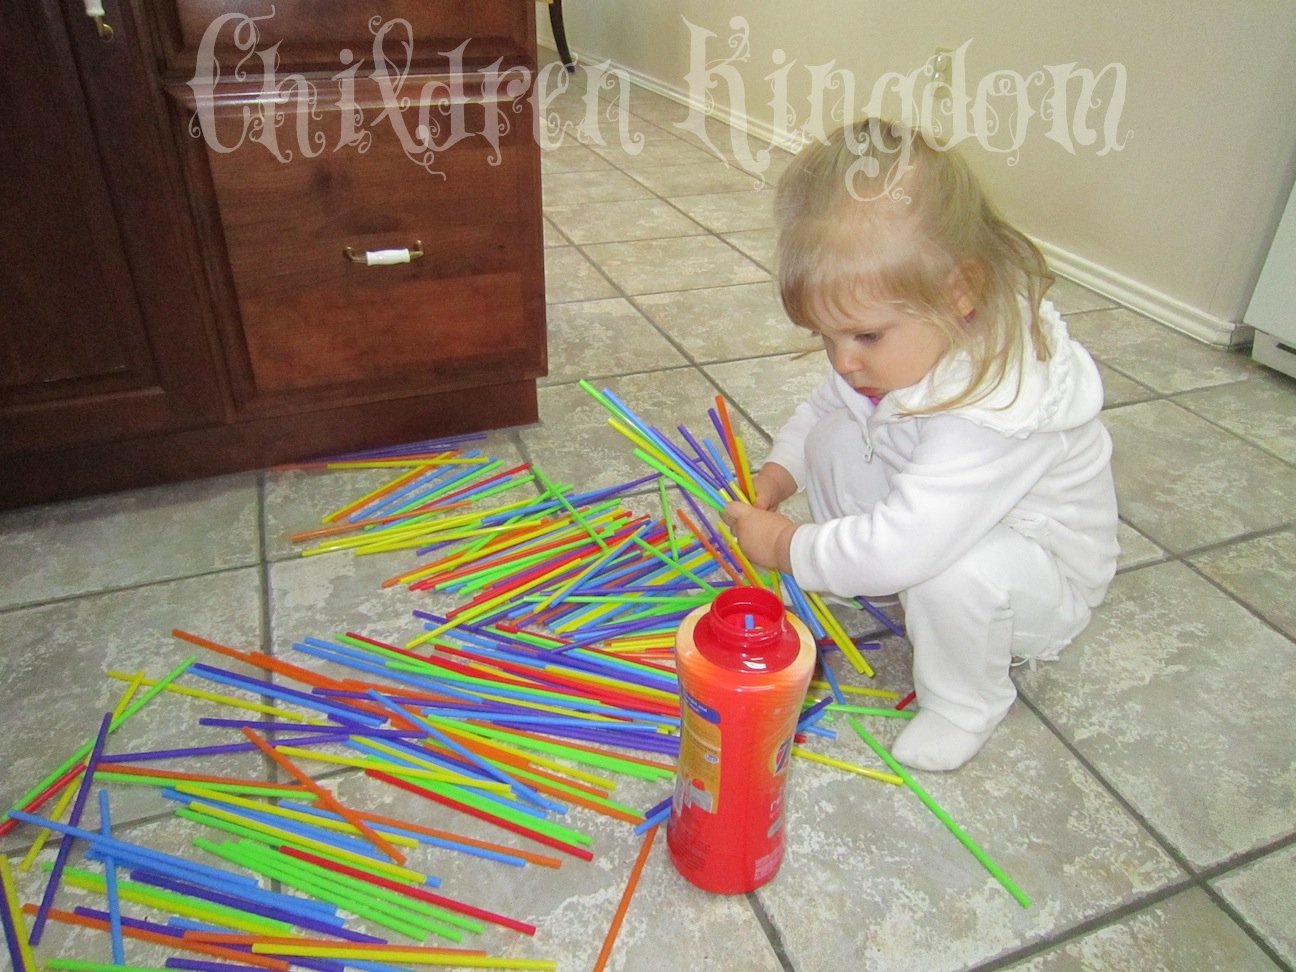
What you do with straws
Monday, March 21, 2011
Our Spring Tree

Friday, March 18, 2011
{this moment}
{this moment :: inspired by soule mama}
A Friday ritual. A single photo - no words - capturing a moment from the week. A simple, special, extraordinary moment. A moment I want to pause, savor and remember.
Thursday, March 17, 2011
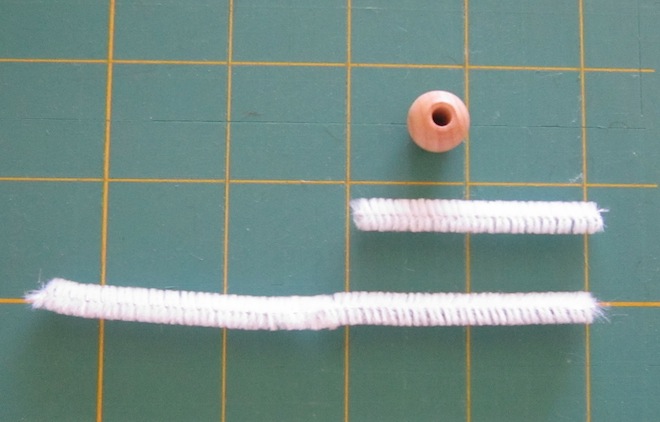
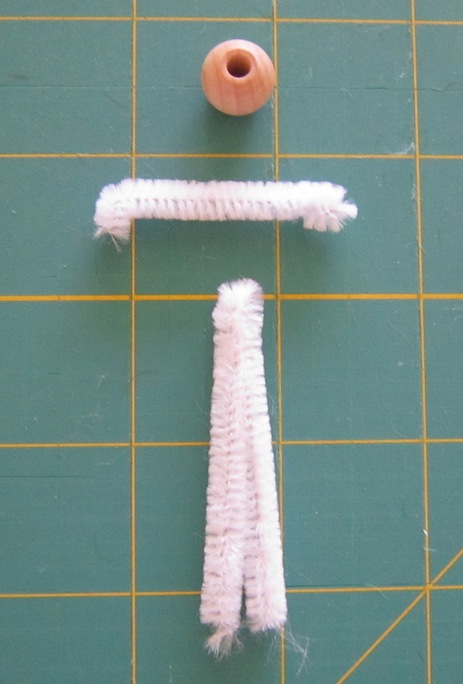
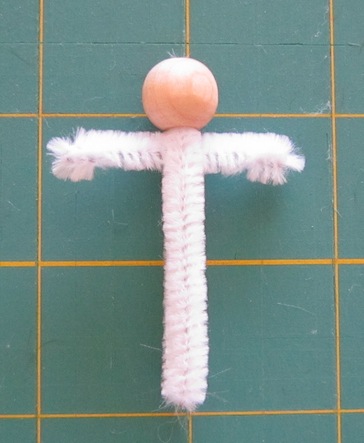
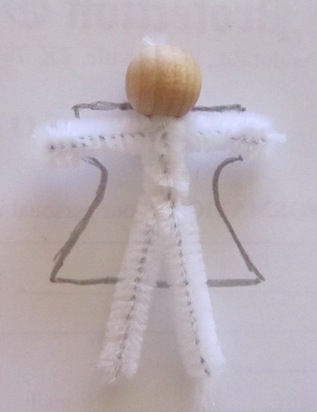
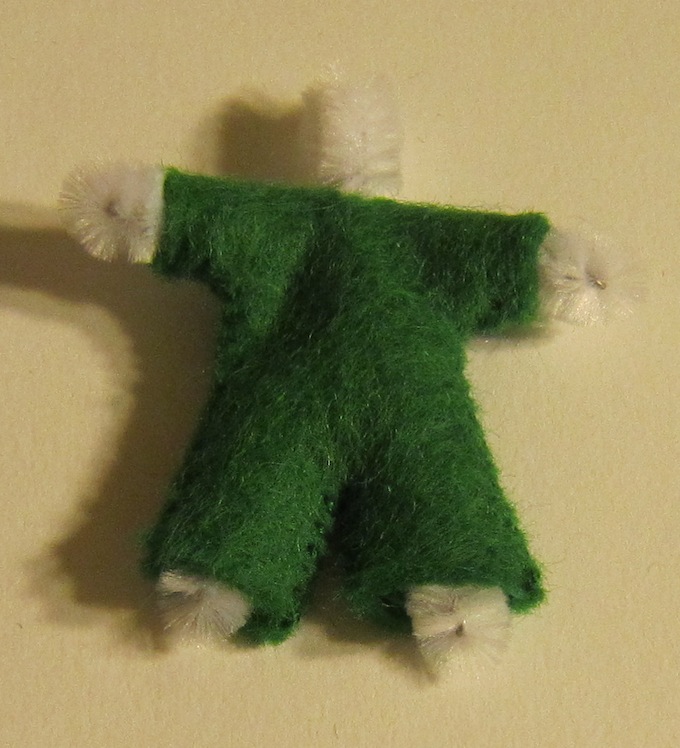
Rainbow Elves tutorial
What you need:
White pipe cleaner
Wooden bead 1/2" diameter
Scraps of felt
Matching thread
Needle
Scissors
Wire cutter to cut pipe cleaner
Glue (I used school glue)
Paper to make patterns
Clear tape and stapler - handy for cutting out felt
1. Cut two pieces of pipe cleaner - 2" and 4 1/2" (or, if you are using a different size bead, you can adjust lengths to look proportionate).


Tuesday, March 15, 2011
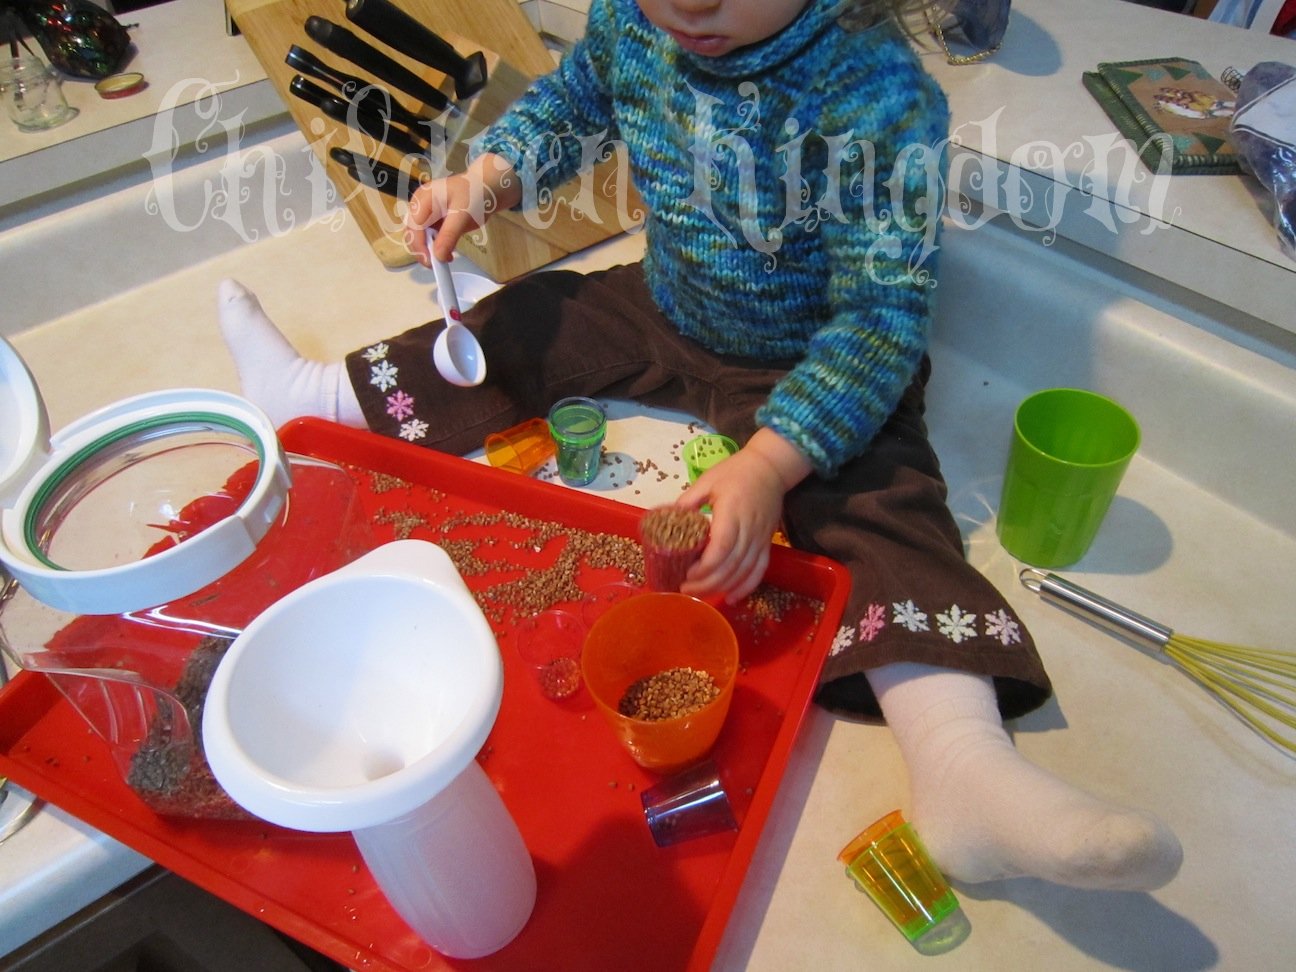
Buckwheat Fun
Monday, March 14, 2011
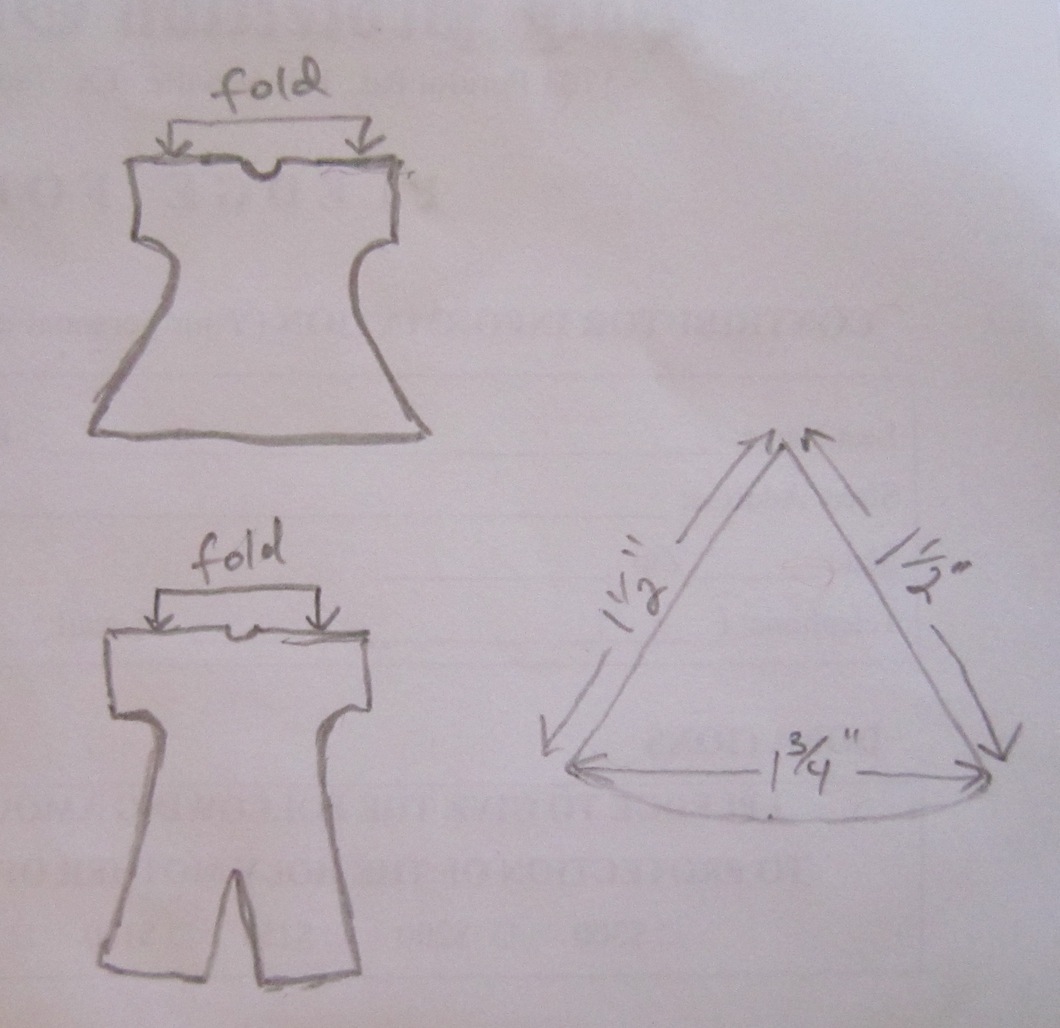
Bonnet Tutorial

What you will need - 1/3 yard of exterior fabric, 1/4 yard of lining fabric, 1 yard of ribbon, thread. The amount of fabric will depend on your size but this should be plenty. Allow extra for one way design fabric.
1. Cut out pieces according to pattern: from exterior fabric cut 1 back (pattern, 1/4" SA - seam allowance included), 1 side (cut 4.5" by 16.5" (1/4" SA included) and optionally cut off all angles according to the diagram - 1/2" from short sides and 4.25" from long sides) and 1 ruffle (24.5" by 3.75", 3/8 SA included) pieces; from lining fabric cut 1 back and 1 side pieces, from ribbon or other cord cut 2 pieces as long as would like your ties to be (you can always trim later, so better leave some extra length). I advise you to cut 1 back and 1 side piece from other fabric, sew them together as in step 3 and try it on your child. It does not take long but you may find out that you need to make adjustments, since every head is different.
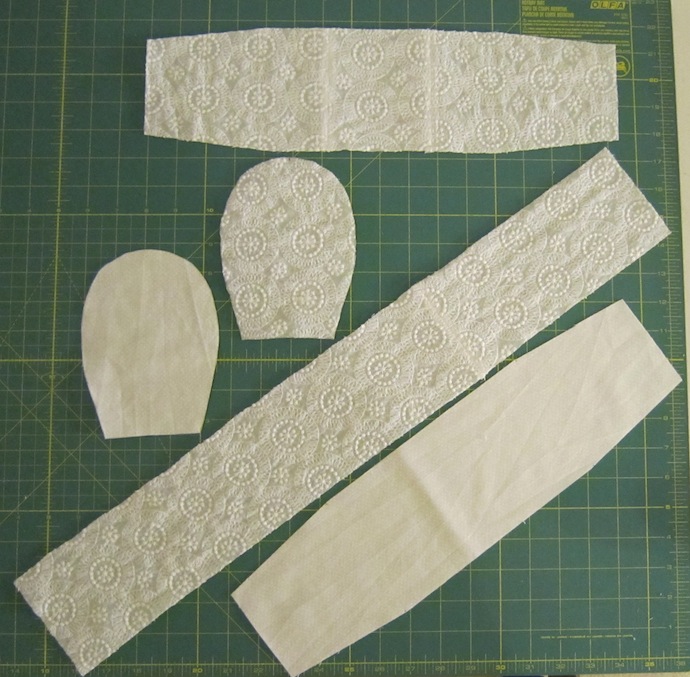
Disregard the pieced pieces, I was running out of fabric
2. If you need a different size of bonnet, lay your child with her back of the head on a piece of paper and quickly, before she rans away, trace the head, holding your pencil almost perpendicular to the paper (if you angle it toward the head you will have too much of a difference between front width and back width, which will make for a difficult shaping and lots of adjustments). Measure the distance between crown of the head and how low you want your bonnet to be and draw the bottom accordingly. Add seam allowances along all edges. Cut out (it is best to fold the pattern in half and cut a symmetrical piece) and see how it looks on your child's head. If it seems to be about right, measure the circumference of the rounded part and this will be the length of the side piece. Its width will depend on your child's measurement - measure from the back of the head to approximately hairline or where you want your bonnet to end (remember to count for a ruffle if you are making one). Add seam allowances to the width (they are already added for length since you measured it from the back piece). I chose to make the ends narrower, so that it fits the curve of the head better, but you may skip that, I don't believe it made that much of a difference. I just pinched the side while Kitten was wearing it to see how much width I like to subtract and them made it a gradual symmetrical transition. I ended up subtracting 1/2" from top and bottom of the short sides and 4.25" form both ends of the long side, see the pattern, it is much clearer in drawing. For the ruffle (although you can omit it if you like) I multiplied the length of the side piece by 1.5, if you want a fuller ruffle, you may multiply by 2. For the width, decide how wide you want your ruffle to be, add seam allowance (I recommend at least 3/8") and multiply by 2. If you are making your own pattern, it is especially important to make a muslin.


4. Pin the lining to the exterior along the bottom edge right sides facing, aligning side seams and pinning ribbons in between and directed inside the bonnet. Leave at least your seam allowance and a little more between ribbon and side. Stitch, making sure not to catch extra ribbon in your stitching.
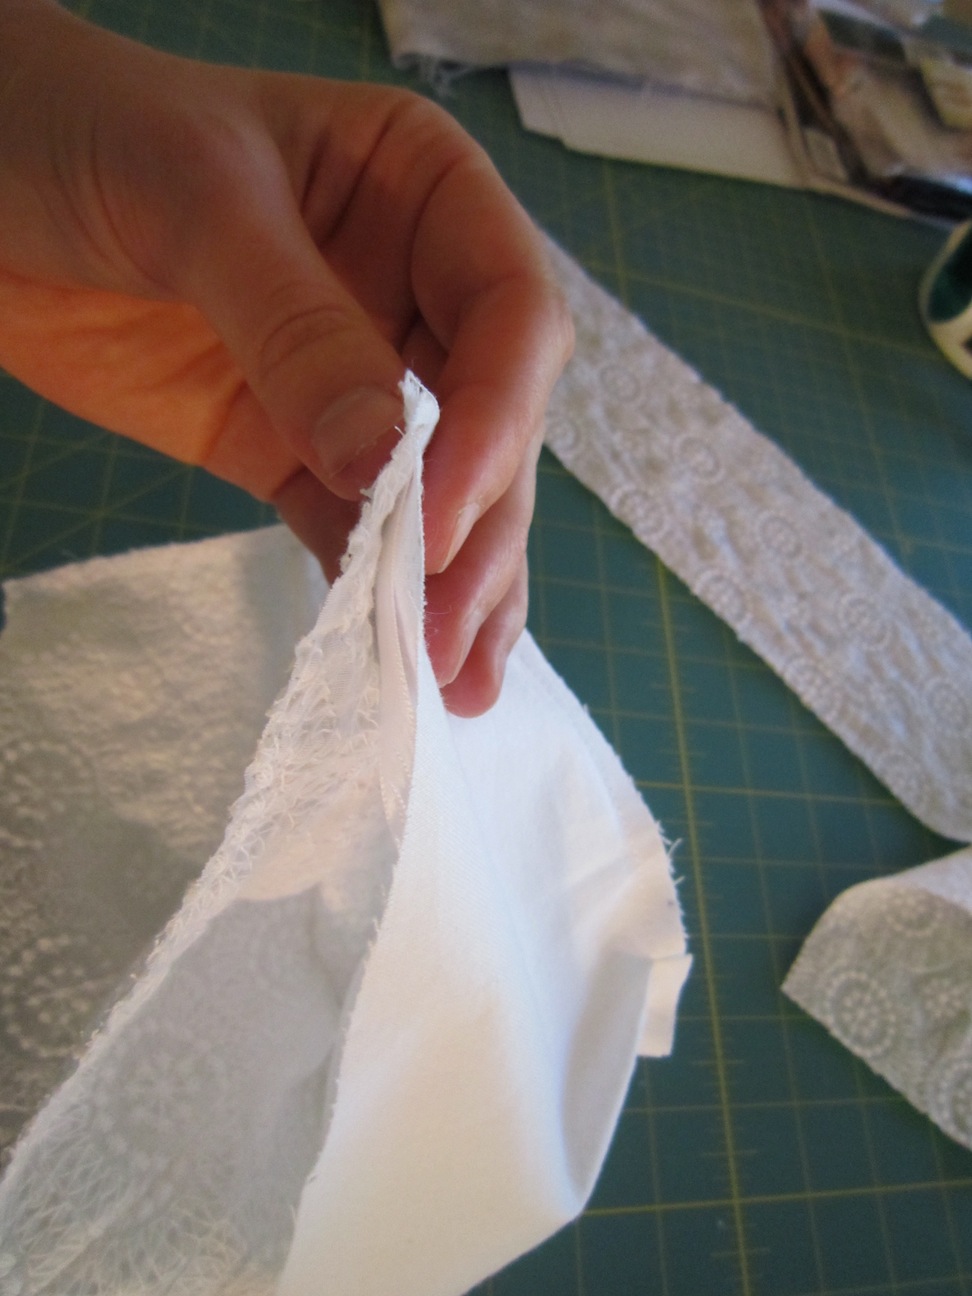

5. To make a ruffle, fold the ruffle piece in half lengthwise right sides facing and stitch together 2 short sides. Trim the corners. Turn the right side out and press. Stitch 2 rows of longest stitch (leave long tail on both sides), I do one 1/4" from the edge and the second one between the edge and the first row. Make sure they do not cross each other! Next, tie top and bottom threads of both rows on one end.


6. Find the middle and quarters on your bonnet and ruffle and pin the ends and those places ONLY to the exterior fabric. Ruffle should be facing away from the front and be attached to the right side of the exterior fabric. Grab the two top threads of the ruffle and pull gently, easing fabric along the threads. Keep pulling and sliding until the length of your ruffle matches the length of the bonnet front. Spread the gathers so that all quarter sections are even. Stitch in place 1/2" away from the edge, so that gathering stitches are enclosed.


7. Turn down the seam allowance on the lining and hand stitch in place, encasing the ruffle seam allowance. Top stitch along the bonnet face opening.

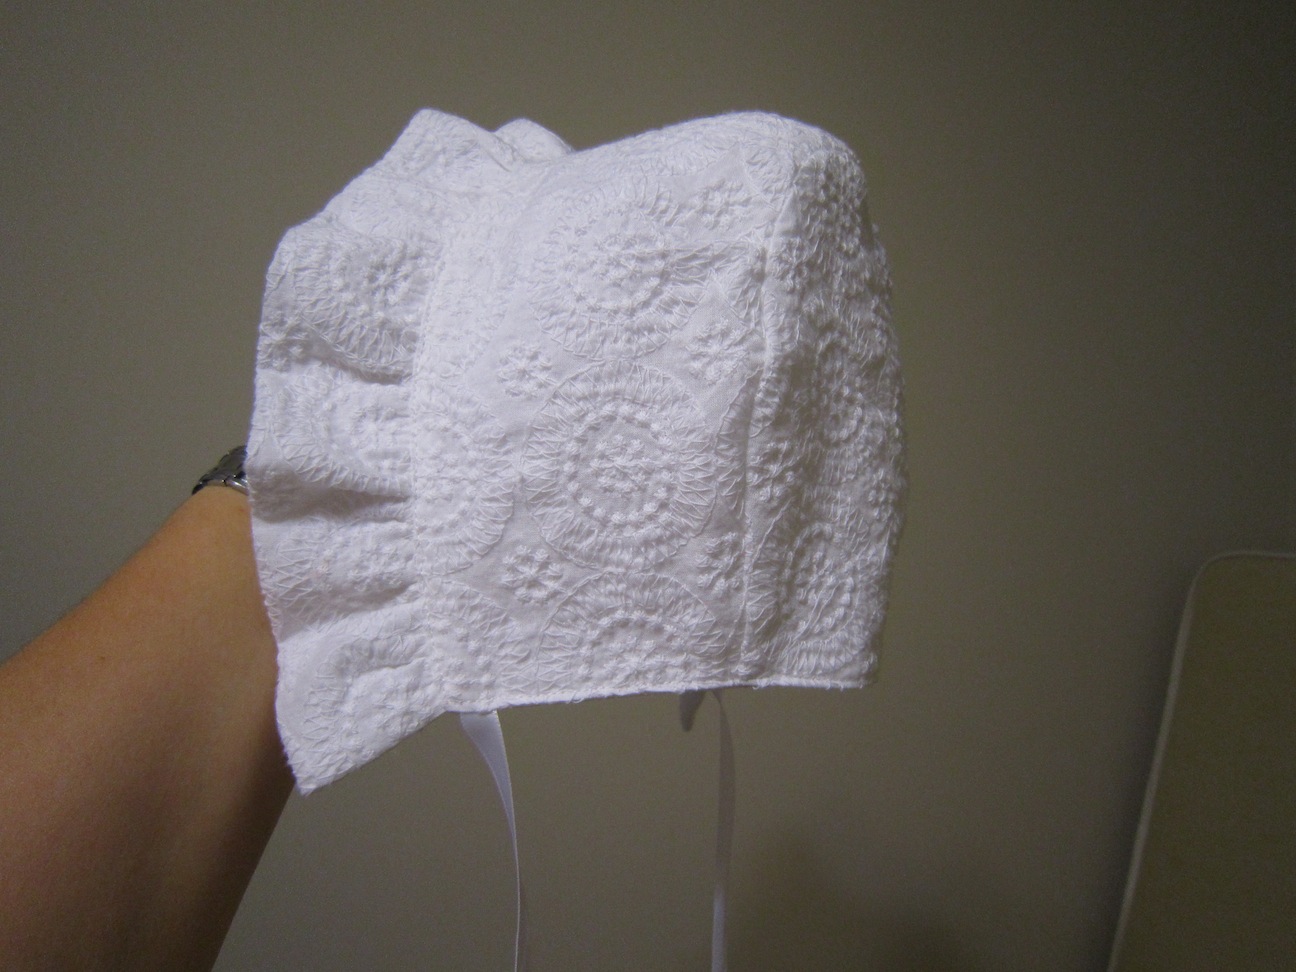

Please tell me if there are any questions or something is unclear. The explanation is long and it probably sounds more complicated that it actually is, but believe me, this is really easy. If you make a bonnet using this pattern, please send me a link, I would love to see it.
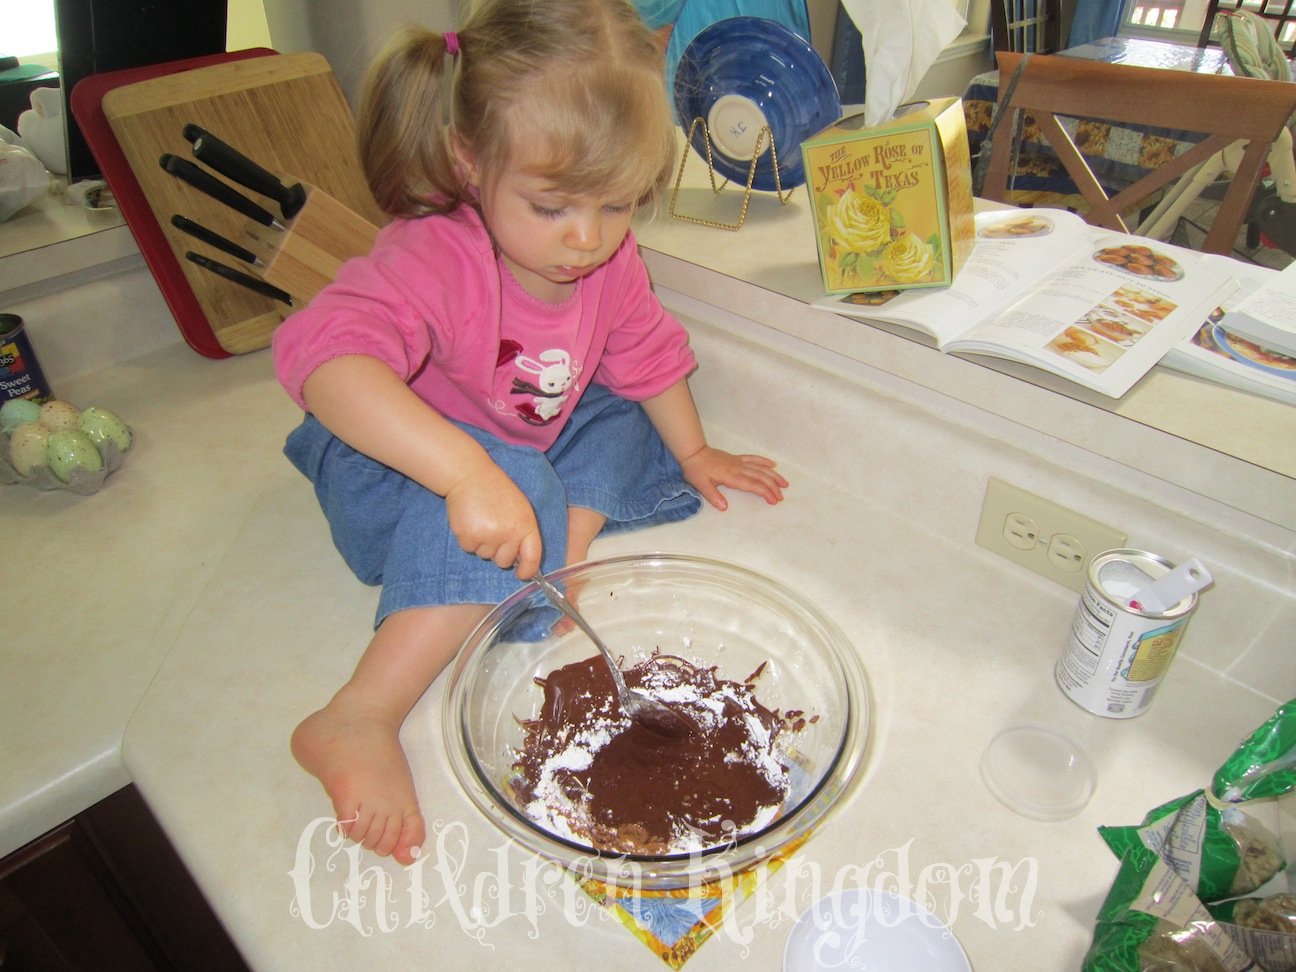
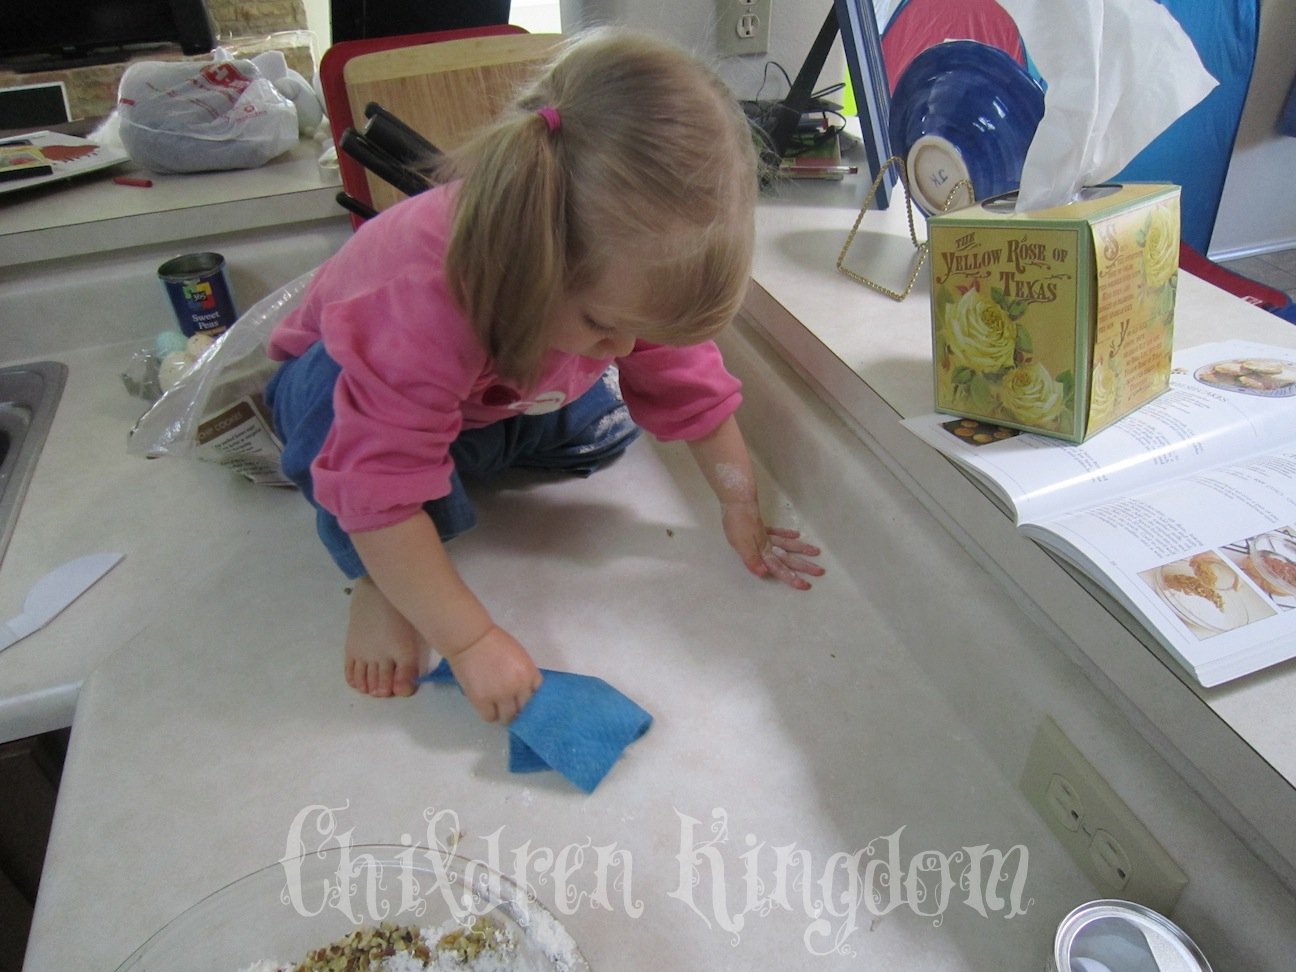
Chocolate Nut muffins

Ingredients:
4 oz semisweet chocolate
2 cups flour
1 tbsp baking powder
1/2 tsp grond cinnamon
1/3 cup packed brown sugar (or a cup, see above)
1 cup coarsely chopped walnuts
1 cup milk
1/4 cup vegetable oil
1 tsp vanilla extract
1 egg
Preheat oven to 400F. Greaze a 12-cup muffin pan. Kitten loved it.


Saturday, March 12, 2011
Fun with Animal upon Animal by Haba

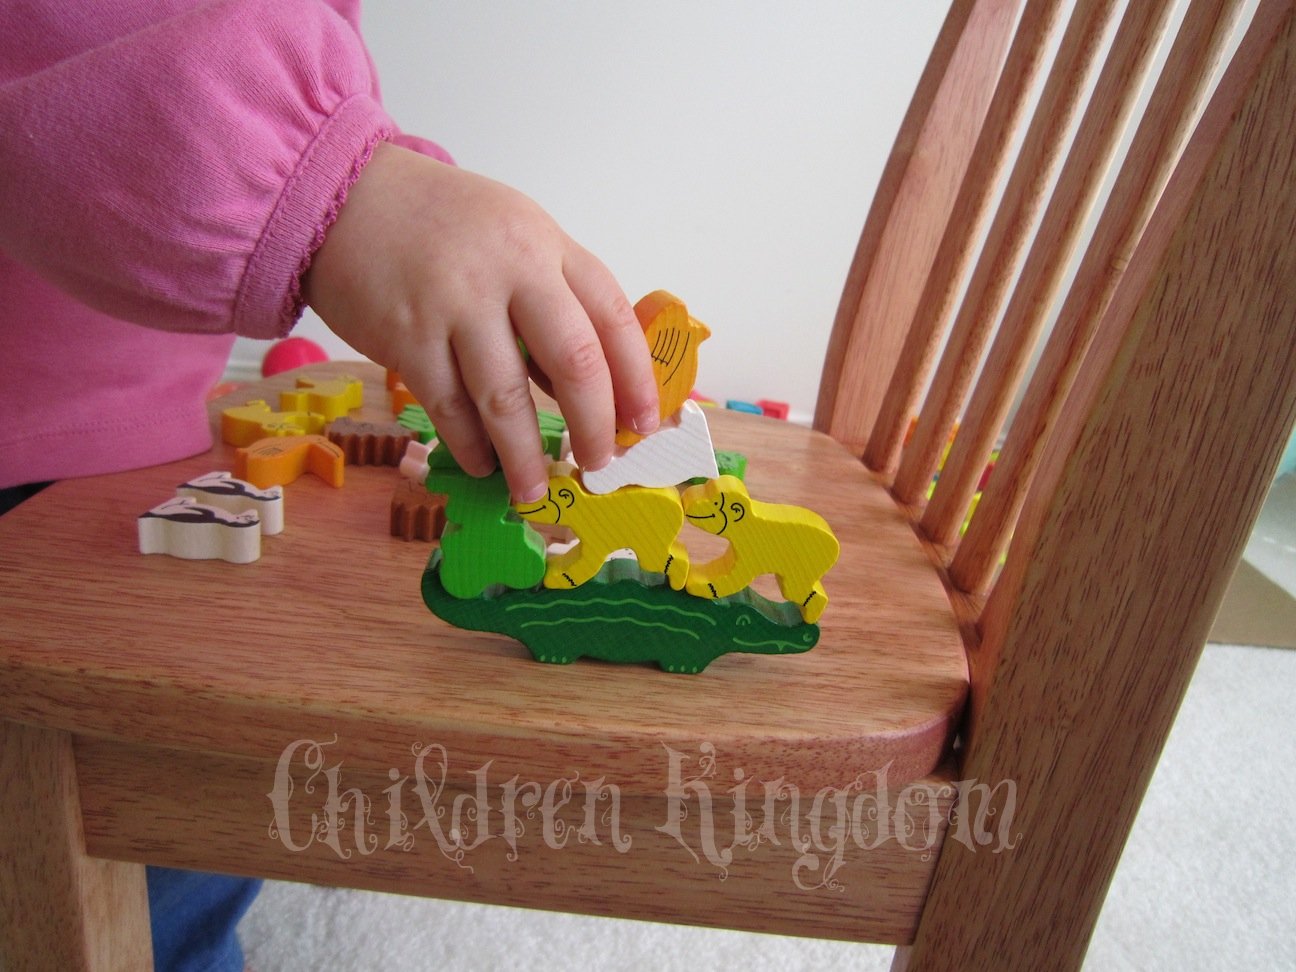
This one was done by me, of course, Kitten is just about to destroy it
It is actually amazingly fun for adults too, even my husband, who is more of a computer game guy, grudgingly admitted that there is something to it. Although it is marked for 4+ kids, my almost 2 year old is enjoying it a lot.


Friday, March 11, 2011
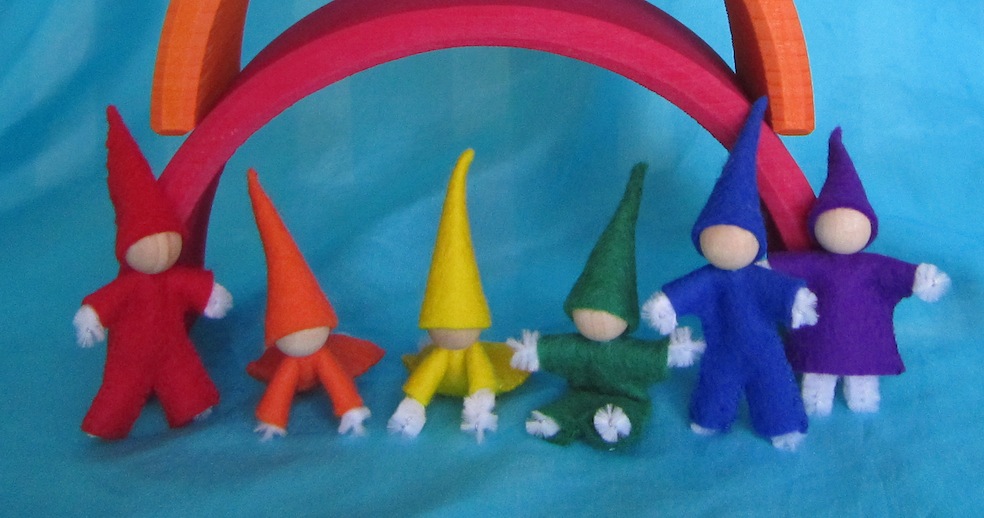
The Story of Rainbow Elves

High in the sky, of course when it is not needed here on earth, hides the Rainbow. But it looks nothing like a rainbow you're used to seeing. When it visits us it is all proper and orderly. But when it is at home, its true playful nature takes over and colors mix and change places and play hide-and-seek.
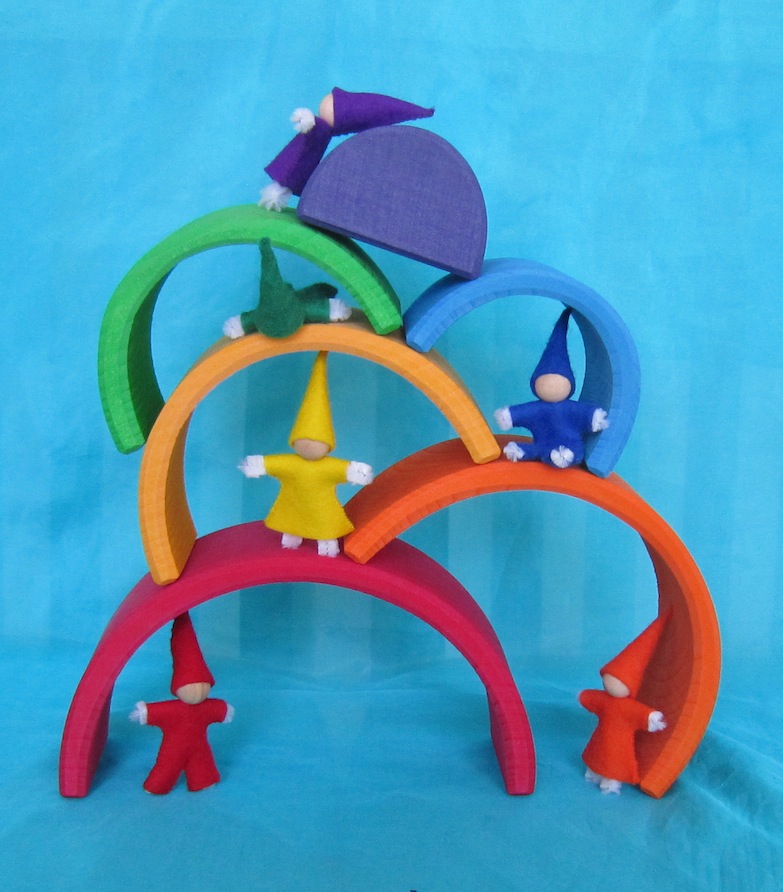
Inside the rainbow live 6 little Rainbow elves. They really like their ever-changing colorful home and don't mind moving their possessions around every few days. The Red elf is always full of energy and bossing others around, the Orange and Yellow elves are happy and careless, the Blue elf is serious and slow in making decisions, they often have arguments with the Red elf. The Green elf likes everybody to live in peace and is usually the connecting link between others. And on the very top, in the littlest purple house, slightly away from others, lives the little Violet elf, who likes stargazing and dreaming.
But, despite all their differences, they are all best friends and cannot imagine ever parting. They have all sorts of adventures. Did you know, for example, that if you line up the rainbow arches just right, you can travel across that Rainbow Bridge to other wonderful worlds? Little elves do it all the time, since it is not that often that the Rainbow has to make an appearance in our skies. But this is quite a different story…

Visit next week for a master class on how to make your own Rainbow elves.
Subscribe to:
Posts (Atom)